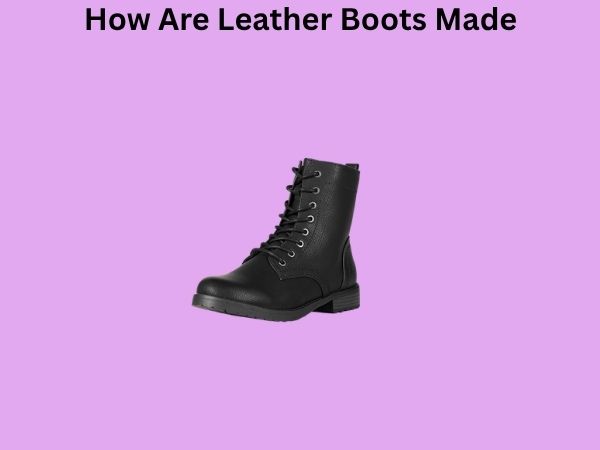
How Are Leather Boots Made? A Complete Journey From Hide to Sole
Have you ever looked down at your leather boots and wondered what incredible journey they took before landing on your feet? I mean, think about it—there’s something almost magical about a well-made pair of leather boots. They feel like they were born to hug your feet, they develop character over time, and they seem to get better with age. But this isn’t magic; it’s craftsmanship.
The process of making leather boots is a beautiful blend of ancient techniques and modern innovation. It’s a story that starts with a cow grazing in a pasture and ends with you slipping your foot into a perfectly molded piece of wearable art. Throughout this article, we’re going to demystify this entire process, step by step. Whether you’re a boot enthusiast, someone considering an investment in quality footwear, or simply curious about manufacturing processes, you’re in for a treat.
Understanding Raw Materials: Where It All Begins
Sourcing Quality Hides
Everything starts with the hide. No, not just any hide—manufacturers specifically seek hides that meet strict quality standards. These typically come from cattle that have been raised for meat production. The hide is essentially a byproduct of the food industry, which means responsible boot makers aren’t hunting animals solely for their skin.
The sourcing is actually more complex than you might think. Boot manufacturers work with tanneries that have established relationships with slaughterhouses and ranches. They look for hides with minimal blemishes, scars, or brands. The size matters too—larger hides mean fewer seams and stronger boots overall. A single hide might be anywhere from 40 to 50 square feet, and you’d be surprised how much of that gets used or discarded during the manufacturing process.
Initial Hide Preservation
Once a hide is removed from the animal, it needs immediate preservation. Before it reaches the tannery, the hide is salted or dried. Salt acts as a natural preservative, preventing decomposition and bacterial growth. This step is crucial because it can take weeks or even months for a hide to travel from the slaughterhouse to the tannery, and preservation ensures the material remains viable for processing.
The Tanning Process: Transforming Raw Hide into Leather
What Is Tanning, Anyway?
Tanning is where the real magic happens. Think of it as a chemical transformation—you’re taking a perishable, stiff animal hide and converting it into a durable, flexible material that can last decades. Without tanning, leather would simply rot. With it, you get something extraordinary.
The Wet Blue Process
The journey begins with soaking. The preserved hide is submerged in water to rehydrate it and remove salt. Then comes the liming process, where the hide is treated with lime (calcium hydroxide) and sodium carbonate. This removes remaining hair, fat, and proteins from the hide, leaving behind mostly collagen—the protein that gives leather its structure.
Next is the actual tanning step. For many quality leather boots, manufacturers use chromium tanning. The hide is treated with chromium sulfate, which bonds with the collagen fibers. This creates what’s called “wet blue” leather—it has a distinctive blue color and is incredibly flexible. Chrome tanning is quick (taking about one day), which makes it economical, and it produces leather that can be dyed easily and is resistant to heat.
Vegetable Tanning Alternative
Some premium boot manufacturers use vegetable tanning instead. This traditional method uses tannins from tree bark—typically oak, chestnut, or hemlock. It’s a slower process, sometimes taking several months, but the resulting leather develops a beautiful patina over time. Many heritage boot brands swear by this method because the leather ages gracefully, becoming richer in color and more supple with wear.
Here’s the key difference: vegetable-tanned leather is stiffer initially but softens beautifully with use. Chrome-tanned leather is softer right away but doesn’t develop quite the same character. Both are legitimate, and the choice depends on the manufacturer’s philosophy and the boot’s intended use.
Leather Preparation: Getting Ready for Construction
Splitting and Shaving
After tanning, the leather still isn’t ready for boot making. The hide is still too thick and uneven. Manufacturers use specialized machinery to split the hide into layers. The top layer, called the grain layer, is the finest quality and goes into premium boots. The lower layers might be used for different products or reinforcement areas.
Then comes shaving—running the leather through machines that make the thickness consistent throughout. Uniform thickness is critical because it ensures even stretching, molding, and durability. Imagine if one part of your boot’s upper was thick and another part was thin—that thin section would likely fail first.
Dyeing and Finishing
Now we add color. If the leather isn’t already dyed during the tanning process, it happens now. Manufacturers submerge the leather in dye baths, carefully controlling temperature and time to achieve consistent, even coloring. This is where those beautiful browns, blacks, tans, and burgundies come from.
After dyeing, the leather receives finishing treatments. These might include:
- Oils and waxes for water resistance and suppleness
- Sealers for color protection
- Matte or shiny topcoats depending on the desired aesthetic
- Protective layers that will eventually patina with age
The Art of Cutting: Patterns and Precision
Pattern Making and Layout
Before a single piece is cut, designers create patterns for each boot component. These patterns are precise—they account for how leather stretches, where seams should be placed for durability, and how to minimize waste. A good boot pattern is almost like a puzzle.
Leather cutters then arrange these patterns on the prepared hides, trying to maximize the amount of usable material. This is where experienced craftspeople shine—they can look at a hide’s grain, identify any weak spots, and position patterns to avoid them. It’s not unlike a puzzle, but with a three-dimensional element of understanding leather’s natural variations.
Cutting Methods: Old School and Modern
High-end boot manufacturers might use hand-cutting methods, where skilled workers use sharp knives to cut each piece precisely. This allows them to work around imperfections and maximize quality. However, most manufacturers now use die-cutting machines—huge presses that cut multiple pieces simultaneously with perfect consistency.
Automated cutting is faster and more economical, and when the dies are created well, the results are absolutely consistent. Whether hand-cut or machine-cut, the goal is the same: precision pieces that will fit together perfectly during assembly.
Upper Construction: Building the Boot’s Body
Preparing the Upper Components
The “upper” is everything except the sole—it’s what wraps around your foot. Creating it requires multiple pieces stitched together. Before stitching, pieces might be cemented or glued to reinforce them, especially at stress points like the heel counter and toe box.
Lasting: The Boot’s Foundation
Here’s a step that really fascinates me: the leather is stretched over a “last,” which is essentially a foot-shaped mold. The last determines the boot’s fit, toe shape, and overall form. Premium boot makers invest in multiple lasts in different sizes and widths.
The leather is moistened slightly (usually with water or steam) to make it pliable, then stretched over the last and secured with nails or staples. As it dries, the leather hardens into the boot’s permanent shape. This is why boots from the same maker tend to have a distinctive fit and look—the last is the boot maker’s signature.
Stitching and Assembly
Now the individual pieces are stitched together. This happens in stages. The vamp (the front part over your toes) is stitched to the side pieces. The heel counter is reinforced and attached. The topline or shaft is stitched to the upper portions.
Some boots use goodyear welt construction, which is an advanced stitching method where a welt (a strip of leather) is sewn between the upper and sole. This allows for the sole to be replaced later without damaging the boot’s upper—a mark of serious quality footwear.
Other construction methods include:
- Blake stitching: faster but not replaceable
- Norwegian welt: similar to Goodyear but with extra waterproofing
- Cementing: gluing the sole directly, most common in modern boots
- Direct injection: pouring molten rubber around the upper
Sole Attachment: The Critical Connection
Preparing the Sole
While the upper is being constructed, the sole is prepared separately. Most quality leather boot soles are made from leather (for tradition and breathability) or rubber (for durability and traction). Some premium boots use stacked leather soles, which is incredibly durable.
The sole’s bottom surface is roughened, usually through sanding or a special treatment, to help adhesive bond better. Edge finishes might be added—some makers use a dark stain or seal the edges to protect against moisture and wear.
Sole Attachment Methods
As I mentioned earlier, there are several ways to attach a sole to an upper. Goodyear welt construction is considered the gold standard because it’s the most repairable. The welt is stitched to the insole and upper, and then the outer sole is attached to the welt. When the outer sole wears down, a cobbler can remove and replace just that part.
Cement gluing is simpler and faster. The sole is roughened, both surfaces are coated with adhesive, and they’re pressed together. This is strong and fine for most uses, but it’s essentially permanent—if the sole fails, the boot is essentially done.
Insoles and Linings: Comfort and Support
Insole Installation
The insole—what your foot actually rests on—is inserted after the upper and sole are essentially complete. Quality insoles might be leather, cork, or specialized foam. Some are arch-supporting, others are simple cushioning. Premium boots often have leather insoles that mold to your foot over time.
Lining Materials
The lining is the interior surface you feel against your foot. Natural leather linings are ideal because they breathe and mold to your foot. Cotton or wool linings are also used. Some modern boots use synthetic linings for easier care and durability.
Finishing Touches: From Workshop to Wardrobe
Shaping and Conditioning
After assembly, the boots are still on their lasts. They’re often placed in ovens or moisture chambers to help them set properly and to further condition the leather. Some makers apply conditioners or oils to prepare the leather for its new owner’s care routine.
Quality Control Inspection
This is where boots are examined closely. Workers check for:
- Stitch quality and alignment
- Even dyeing and coloring
- Proper sole attachment
- Symmetry between the left and right boot
- Leather integrity with no tears or major defects
- Proper fit and last shape
Boots that don’t pass inspection might be sent back for repairs or rejected entirely. Good makers don’t compromise on quality just to hit numbers.
Final Treatments
The lasts are finally removed. The insoles are cleaned and pressed. Some makers apply a final waterproofing treatment. The boots might be buffed to shine or scuffed to create a particular aesthetic. Labels are attached, and the boots are paired, packed, and boxed.
Manufacturing Methods Across the Globe
European Craftsmanship Traditions
European boot makers, particularly in England, Spain, and Italy, often follow centuries-old traditions. Many still use Goodyear welt construction and vegetable-tanned leather. The pace is slower, the attention to detail is meticulous, and the boots are typically more expensive.
American Approach
American boot manufacturing, especially among heritage brands, often emphasizes durability and function. Many American-made boots are designed for work and outdoor use, built to withstand harsh conditions. The construction methods are often simpler than European methods but equally robust.
Asian Manufacturing
Asian factories, particularly in Vietnam, Cambodia, and Indonesia, produce the majority of the world’s boots. Modern facilities here use the latest technology and can produce excellent quality at various price points. The advantage is efficiency and cost-effectiveness, though some luxury brands still choose European or American production for brand positioning.
Where Technology Meets Tradition
Computer-Aided Design
Modern boot makers use CAD (Computer-Aided Design) to create perfect patterns and visualize the final product before production begins. This reduces errors and waste, and allows for quick adjustments and customization.
Automated Stitching
While some premium makers still hand-stitch, most use automated stitching machines that are incredibly precise. These machines can follow complex patterns and create stitching that’s consistent across every boot.
Quality Checking with Technology
Advanced manufacturers use digital imaging and even AI-powered systems to spot defects that the human eye might miss. This ensures consistency across large batches while reducing the need for manual inspection.
The Human Touch Remains Essential
Despite all this technology, skilled workers are still irreplaceable. They understand leather’s behavior, make judgment calls about quality, perform complex operations, and oversee the entire process. The best boots are made where technology serves craftsmanship, not the other way around.
Sustainability in Boot Manufacturing
Leather as a Byproduct
One often-overlooked point: leather boot manufacturing is actually quite sustainable. The leather comes from animals raised for meat. Using the hide is a form of waste reduction—it gives value to something that would otherwise be discarded.
Tanning and Environmental Impact
The tanning process can be environmentally intensive. However, responsible manufacturers use proper waste water treatment, and vegetable t